Troubleshooting Ethernet-over-Coax Like It's 2010 Again
And now for something completely different… - I’m writing this in case anyone wants to have adventures with Ethernet-over-Coax. At the conclusion of this, I quite emphatically do recommend the GCA-6000, but you need to know how to operate it and that’s what I am sharing here.
The Challenge
Almost every room in my house is hardwired with Ethernet. I made this a priority when we built this place in 2015. However, the budget was not solely mine, and I did not get hardwire into every room in the house. As you can likely guess, this post is about one of the leftovers.
The reasons why I can’t install after-the-fact are not important. We can’t. Moving on, I’m trying some other options.
In the past, I’ve been a big proponent of Powerline Ethernet. In a previous home, we had DSL come into the basement, nowhere near any civilized society. I ran the entire house off a feed from that modem to a solid DD-WRT-enabled WRT54G on the top floor. For DSL speeds in 2008, this worked fine.
Now it’s 2023. I’ve had symmetric gigabit from CenturyLink (nee Qwest) for 8 years. We’ve built our lives around that speed and it’s hard to roll back expectations.
I tried Powerline for this use-case. It was meh. Throughput was around 50Mbps, which is tolerable, but worse is that it was spotty. Connections dropped and re-synced often. Wireless is poor for the same reasons. Wireless connections almost never drop, but in the case they do, it’s bad. Wireless is out.
The room does have coax. And I don’t use coax for anything in this house since I dropped DirecTV in 2019. Sounds like the way to go!
Enter the GCA-6000 , my random pick of hardware from Amazon Not a sponsored link. I don’t make this blog for money, and Amazon affiliate links are verboten in Colorado anyways :f-you-bezos:
Setting it up
The instructions which come with the unit are IKEA-level. By my estimation, I’ve built 150+ pieces of IKEA furniture in my life (this is not an exaggeration), so I’m not complaining but just making a comparison. There’s some cartoons and a happy figure pressing a button.
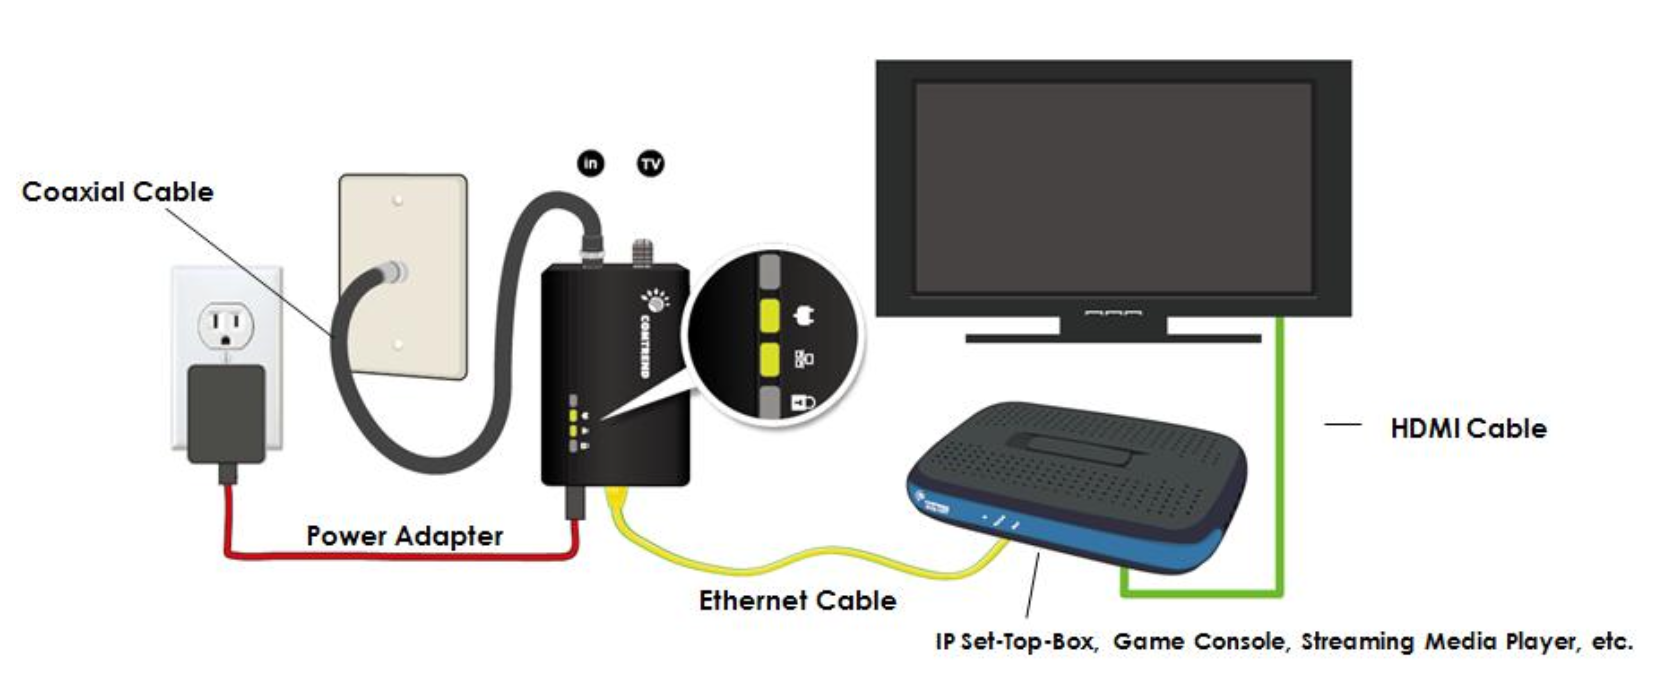
If you don’t know what Ethernet-over-Coax means, I’ll use the images directly from their documentation.
How Ethernet Gets Into the Coax:
How Ethernet Gets Out of the Coax:
Simple enough, right?
How hard could it be?
All you do, according to the IKEA-level-directions, is make the connections as pictured above and it will work. There are no further necessary steps. There are LEDs on both units which communicate status. I have no complaints with the LEDs.
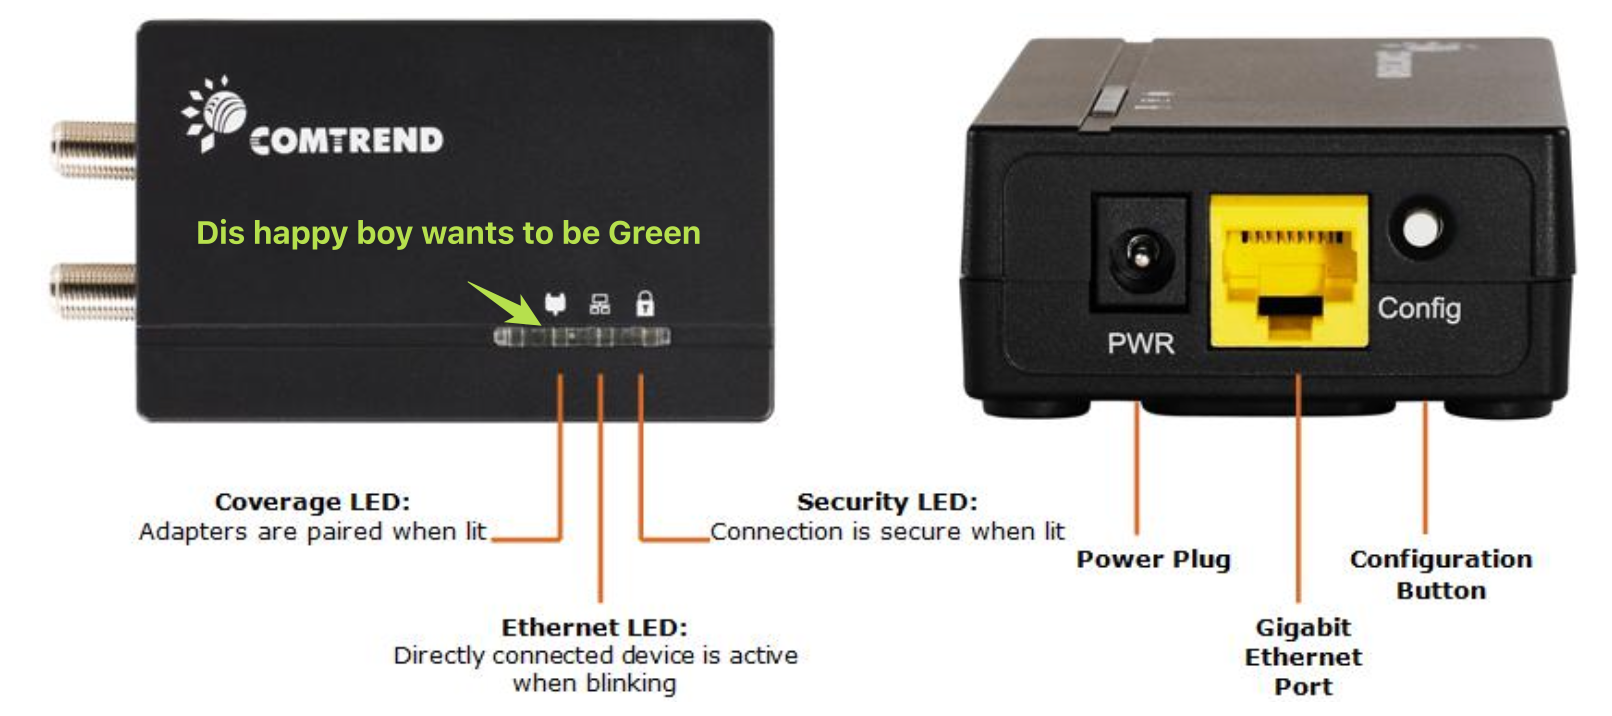
The problem? It didn’t work. The units should “see” each other and talk, but they don’t. There is a “Coverage LED” which communicates this status and it stayed blank. There’s nothing else recommended.
I mentioned there are no further necessary steps, so let’s dig into that for a minute. Let’s review the exact wording of this sub-step:
Ok, so my network doesn’t actually work, but there is a button I can use to make it a secure network. The coax line for Cable/DirecTV is no longer even connected to the outside world, so there is likely no attack vector here which I care about, but ok… I can try to make it secure. Pressing a button is better than just not doing anything at all.
I’ll save a lot of time here and just say…no joy. This didn’t work. Many LEDs were blinked and many minutes were spent waiting for a sync. Eventually, I removed the two units from their eventual positions in the house and switched to using a 2-foot-long piece of coax on my desk to test it.
Queue the Hacknet OST
Do you have a favorite thinking music? I like something I know well, without words, with some energy behind it. Onwards…
I don’t know how this thing works or what I’m supposed to do now. I had purchased it years ago on Amazon and no chance of returning. There’s a MAC address on the outside sticker. Let’s see what arping gives us?
Note: I did not remake the pics after I got this working. Once the family was happy, I’m not touching it. I will note what the values were…
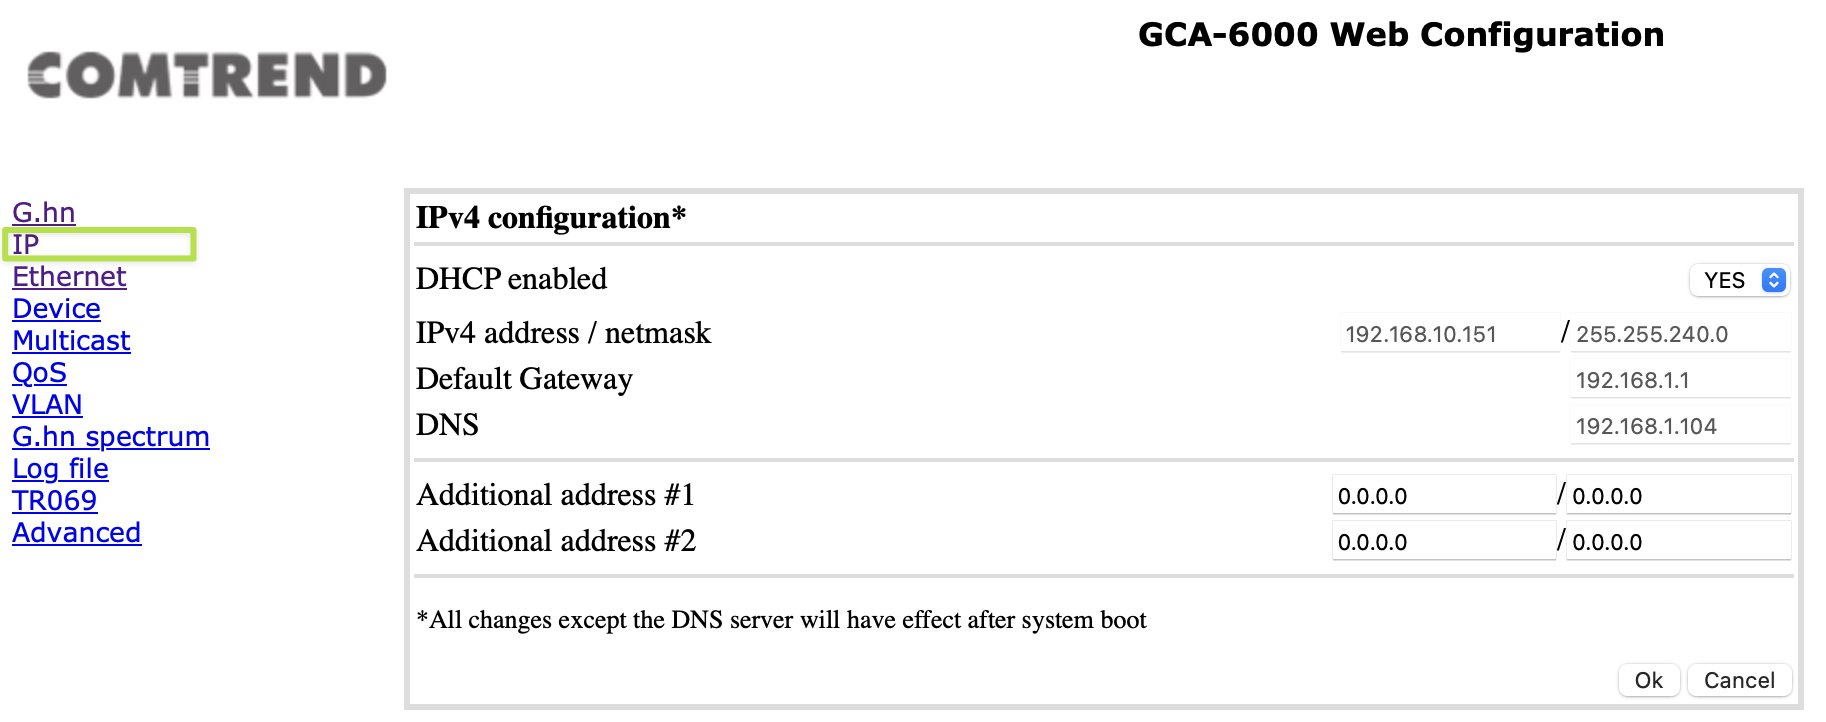
In the image above, you see the IP address I gave the box after it was working. By using arping, I was able to determine it had a default IP of 192.168.0.5. Now the next step should be obvious…
I could just try to open it in a browser, but let’s see if anything else is hiding…

Nope, nothing else interesting. But it’s listening on 80! Let’s go…
Can you guess? It was “admin”.
Alright enough silliness, what do I really need to know?
Enough horsing around, two more steps and we’re done.
First, given each unit arrives with a default static IP of 192.168.0.5 doesn’t help much when configuring. You can set whatever you need from the IP tab, I gave them Static DHCP on my network. And yes, you can access both the Base and the Remote units (even “through” the coax), after all this is installed. That is sweet.
Second, here’s the actual problem: The sender and receiver units need to be set to the same Domain Name, and if you want your network to be secure as they recommend, you need to be using the same Pairing Password.
Perhaps the units are supposed to come in the box with a matched Domain Name set, but this doesn’t scale. The units absolutely support more than 2 in a network, so how would the next sets get matched? The simple instructions don’t get there. There is a manual online, but I promise the picture below is going to help you better:
There is a little Ok button in each section above, yes they all need to be set separately.
The funniest part about this was me thinking the units were somehow sluggish or slow-to-pair. I had both of these on my desk and was guessing at the above settings (see my markup for my advice).
Within 2 seconds of having matched values in the right boxes, the Coverage LED came on. Game on!
The most confusing thing about the instructions is that the order the steps are laid out makes you think that you need to have ethernet connections on both sides to see the Happy LED.
This is not the case. If the boxes are correctly configured, that LED will light on both boxes as soon as both boxes are coax-connected and fully booted. This process takes maybe 10 seconds after powering them up.
As I stated in the beginning, now that I understand these boxes, I am very happy with the performance. iperf3 shows me about 650Mbps through the boxes. That is plenty fast!


